 Save
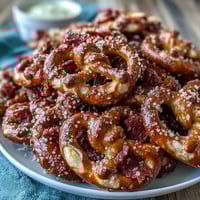
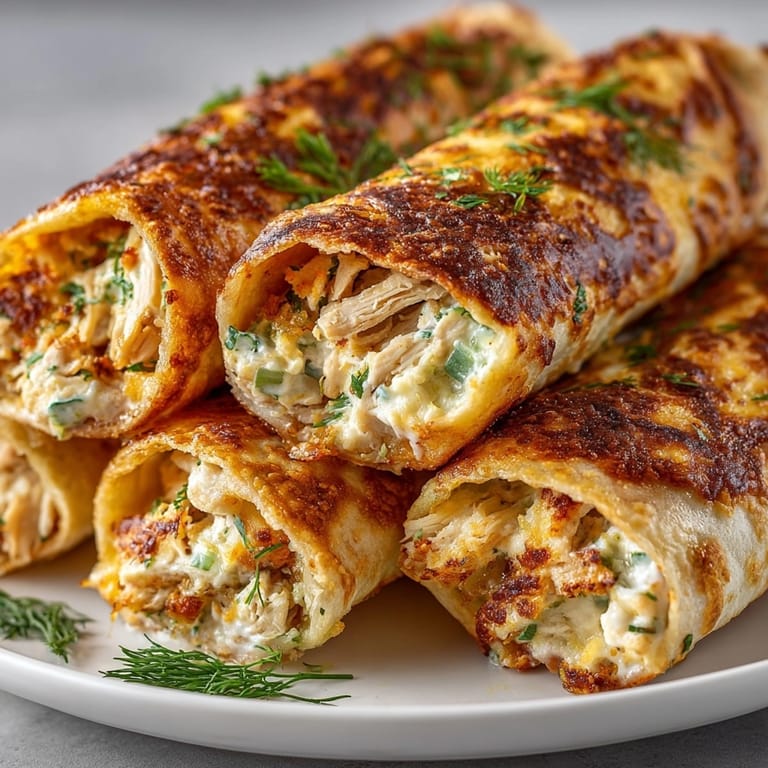
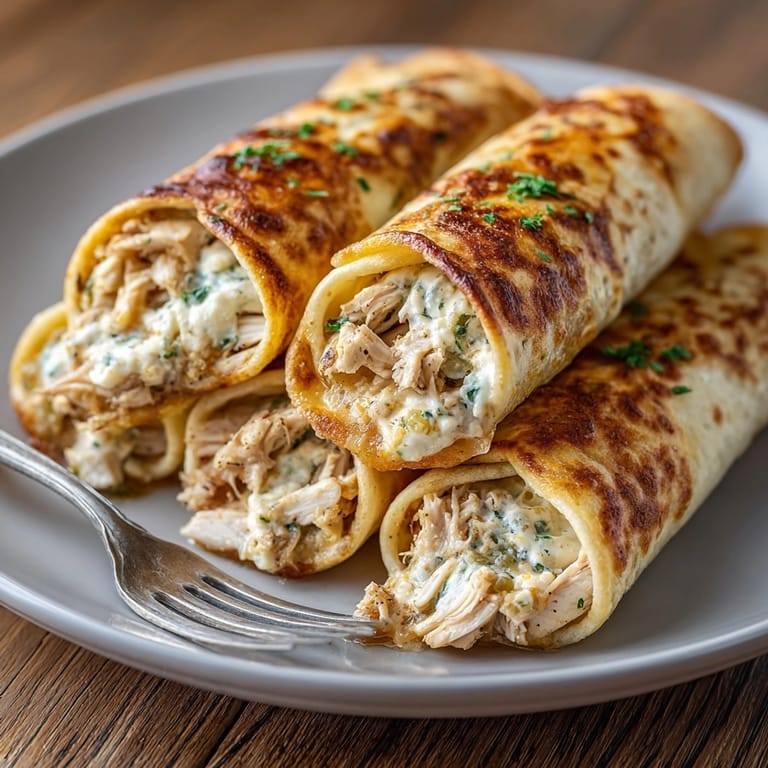
Save This savory dill pickle ranch chicken taquito recipe combines the tangy punch of pickles with creamy ranch-infused chicken, all wrapped in crispy tortillas. Perfect for game days, quick dinners, or anytime you need a crowd-pleasing dish that delivers big flavor in bite-sized packages.
I first made these taquitos for a last-minute game day gathering when I needed something beyond the usual chips and dip. The pickle-ranch combination was such a hit that they've become my most requested appetizer whenever friends come over.
Ingredients
- Shredded chicken breast: creates the protein base and absorbs all the flavors beautifully
- Dill pickles: bring tangy brightness that cuts through the richness
- Cream cheese: adds creaminess and helps bind everything together
- Ranch dressing: infuses the filling with herby flavor without any extra chopping
- Cheddar cheese: provides sharp flavor while mozzarella delivers that essential melty stretch
- Fresh dill: amplifies the pickle flavor and adds vibrant color
- Garlic and onion powders: add depth without overpowering the otheringredients
- Flour tortillas: create the perfect crispy exterior when baked
Tired of Takeout? 🥡
Get 10 meals you can make faster than delivery arrives. Seriously.
One email. No spam. Unsubscribe anytime.
Instructions
- Prepare Your Oven:
- Heat your oven to 425°F which is hotter than you might expect for taquitos but this high heat ensures the tortillas get properly crispy without drying out the filling. Line your baking sheet with parchment for easy cleanup and to prevent sticking.
- Create The Filling:
- Mix together the shredded chicken, finely chopped pickles, softened cream cheese, ranch dressing, both cheeses, and seasonings until thoroughly combined. Make sure your cream cheese is truly softened to room temperature to avoid lumps and ensure even distribution of flavors throughout the mixture.
- Fill And Roll:
- Place about three tablespoons of filling along the bottom third of each tortilla. The key is not overfilling which can cause splitting during baking. Roll each tortilla tightly from bottom to top, making sure the filling stays compact and the seam is secured on the bottom.
- Prepare For Baking:
- Arrange your rolled taquitos on the baking sheet with enough space between each one to allow air circulation. This spacing ensures they crisp evenly on all sides. Lightly spray the tops with olive oil which helps them achieve that golden restaurant quality crispiness.
- Bake To Perfection:
- Bake for 22 to 25 minutes until the tortillas turn a beautiful golden brown and become audibly crispy when tapped. The cheese inside should be completely melted and starting to bubble at the ends of each taquito.
 Save
Save The dill pickles are truly the secret weapon in this recipe. I discovered this combination when looking to use up leftover rotisserie chicken and half a jar of pickles. My husband was skeptical at first but now specifically requests these taquitos when we have guests coming over.
Make-Ahead Options
These taquitos are perfect for meal prepping. You can prepare the filling up to two days in advance and store it covered in the refrigerator. When ready to serve, simply fill, roll, and bake as directed. You can also completely assemble the uncooked taquitos, place them seam side down on a baking sheet, cover with plastic wrap, and refrigerate for up to 24 hours before baking. Just add 2-3 minutes to the baking time if cooking from cold.
Serving Suggestions
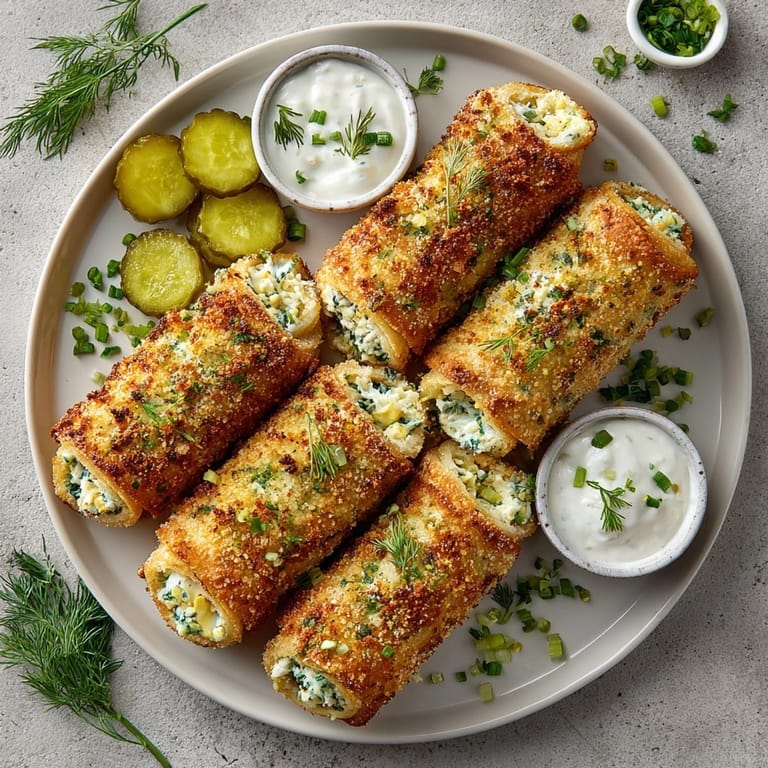
While these taquitos are delicious on their own, they truly shine when paired with complementary sides and dips. Try serving them with a side of cool sour cream, extra ranch dressing, or a zesty avocado crema. For a complete meal, pair with a simple green salad dressed with lime vinaigrette or a side of Mexican street corn. The taquitos also make an excellent addition to a larger appetizer spread alongside guacamole, queso, and fresh vegetables.
Ingredient Substitutions
No chicken on hand? Substitute with shredded pork, turkey, or even black beans for a vegetarian option. Swap regular pickles for bread and butter pickles if you prefer a sweeter flavor profile. Use Greek yogurt instead of cream cheese for a tangier, lighter filling. Replace ranch dressing with Caesar or blue cheese dressing for a different flavor direction. For gluten free needs use corn tortillas but be sure to warm them before rolling to prevent cracking.
 Save
Save Freezer Instructions
These taquitos freeze beautifully making them perfect for meal prep or last minute entertaining. To freeze, arrange completely cooled baked taquitos in a single layer on a baking sheet and freeze until solid, about 2 hours. Transfer to a freezer bag or container, separating layers with parchment paper. They'll keep for up to 3 months. To reheat, place frozen taquitos on a baking sheet and bake at 375°F for 15-20 minutes until heated through and crispy.
Use a kitchen scale to portion filling evenly for perfectly consistent taquitos every time.
Recipe FAQ
- → Can I use rotisserie chicken for the filling?
Yes, rotisserie chicken is a great shortcut and blends well with the other ingredients for convenience and flavor.
- → What type of tortillas work best?
Small flour tortillas roll easily and get crisp in the oven. For a gluten-free option, use corn tortillas and warm them before rolling.
- → How do I keep the taquitos crispy?
Spray the rolled taquitos lightly with olive oil and bake until golden. Flipping them halfway through baking adds extra crispiness.
- → Is it possible to prepare these in advance?
You can assemble the taquitos ahead, refrigerate, and bake them just before serving for best texture and taste.
- → Can I make them spicy?
Add a pinch of cayenne to the filling for a mild heat, or serve with spicy dipping sauces for more kick.