 Save
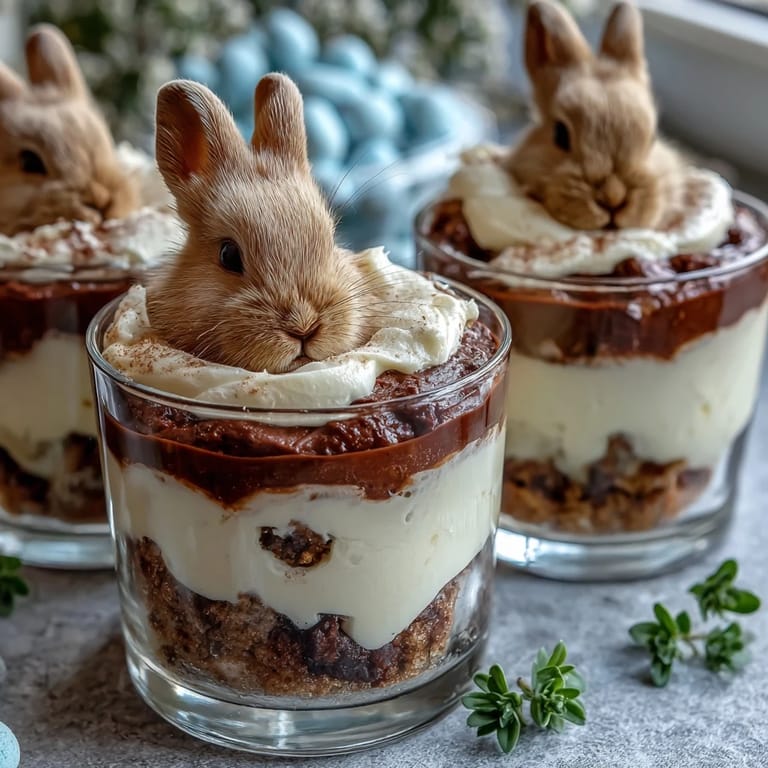
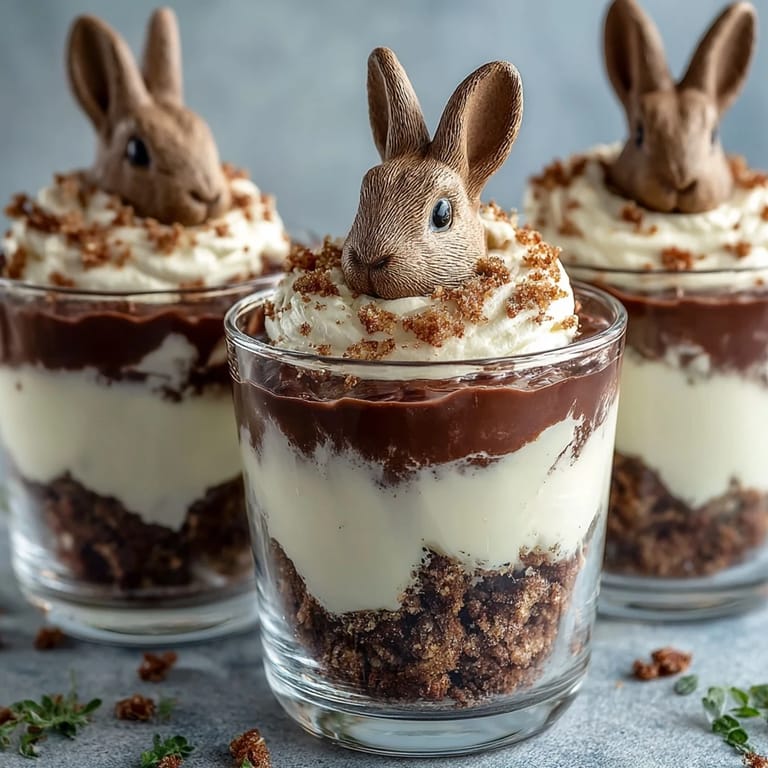
Save Easter Bunny Dirt Cups bring together everything kids love about springtime celebrations: chocolate, cookies, and adorable marshmallow bunnies peeking out from layers of creamy pudding. This no-bake dessert is perfect for Easter parties, classroom treats, or a fun weekend activity with little ones. With only 15 minutes of prep time and no oven required, these delightful cups let children help create their own edible Easter gardens complete with candy eggs and coconut grass.
Save The magic of these dirt cups lies in their playful presentation. Each layer serves a purpose: rich chocolate pudding provides the foundation, fluffy whipped topping adds contrast, and crushed Oreos create the perfect dirt texture for your marshmallow bunnies to nestle into. The candy eggs scattered around add pops of pastel color that capture the essence of Easter morning.
Ingredients
Tired of Takeout? 🥡
Get 10 meals you can make faster than delivery arrives. Seriously.
One email. No spam. Unsubscribe anytime.
- Pudding Layer: 2 cups cold whole milk, 1 (3.9 oz/110 g) package instant chocolate pudding mix
- Cookie Crumble: 16 chocolate sandwich cookies (such as Oreos)
- Cream Layer: 1 cup whipped topping (such as Cool Whip), thawed
- Decorations: 6 marshmallow bunny Peeps or similar bunny-shaped marshmallows, 1/4 cup candy-coated chocolate eggs (mini eggs), 2 tablespoons green-tinted shredded coconut (optional, for grass)
Instructions
- Step 1: Prepare the Pudding
- In a medium bowl, whisk together the cold milk and instant chocolate pudding mix for 2 minutes until thickened. Set aside to further thicken for 5 minutes.
- Step 2: Crush the Cookies
- Place the chocolate sandwich cookies in a zip-top bag and crush them into fine crumbs using a rolling pin.
- Step 3: Layer the Pudding
- Set out 6 clear plastic or glass cups. Spoon a layer of chocolate pudding (about 1/4 cup) into the bottom of each cup.
- Step 4: Add Whipped Topping
- Add a heaping tablespoon of whipped topping over the pudding in each cup, smoothing lightly.
- Step 5: Create the Dirt Layer
- Sprinkle 2–3 tablespoons of crushed cookies over the whipped topping to create a dirt layer.
- Step 6: Position the Bunnies
- Gently press a marshmallow bunny Peeps into each cup so it stands upright in the dirt.
- Step 7: Decorate
- Decorate with candy-coated chocolate eggs and sprinkle green-tinted coconut around the bunny to resemble grass, if using.
- Step 8: Serve
- Serve immediately or refrigerate until ready to serve.
Zusatztipps für die Zubereitung
For best results, use cold milk straight from the refrigerator when preparing the pudding—this helps it set quickly and achieve the perfect consistency. When crushing cookies, aim for a mix of fine crumbs and small chunks to mimic real dirt texture. If the crushed cookies are too uniform, pulse them briefly rather than crushing continuously. Allow the pudding to sit for the full 5 minutes after whisking; this resting time ensures it reaches the ideal thickness for layering. When assembling, work quickly if you plan to serve immediately, or cover individual cups with plastic wrap if refrigerating to prevent the cookie crumbs from becoming soggy.
Varianten und Anpassungen
Transform these dirt cups to suit different tastes and dietary needs. Swap chocolate pudding for vanilla or butterscotch for a different flavor profile. Use homemade whipped cream instead of store-bought whipped topping for a fresher taste. Golden sandwich cookies create a lighter dirt appearance. Add gummy worms peeking out from the dirt for a classic twist. For chocolate lovers, replace bunny Peeps with solid chocolate bunnies. Make them nut-free by carefully checking all candy and cookie labels for allergen warnings. Create a rainbow version using different colored pudding layers, or add a layer of crushed graham crackers between the pudding and whipped topping for extra texture.
Serviervorschläge
These Easter Bunny Dirt Cups shine as centerpiece desserts at children's Easter parties, spring birthday celebrations, or classroom events. Arrange them on a tray lined with artificial grass for an Easter garden display. Pair with pastel-colored napkins and bunny-themed decorations to complete the festive presentation. For an interactive party activity, set up a dirt cup assembly station where kids can build their own cups with various topping options. Serve alongside fresh fruit skewers or carrot sticks with ranch dip to balance the sweetness. These cups also make excellent individual desserts for Easter brunch, positioned at each place setting for a delightful surprise.
 Save
Save Easter Bunny Dirt Cups capture the joy and whimsy of spring in a simple, child-friendly dessert that requires no special baking skills. Whether you're planning an elaborate Easter celebration or simply want a fun treat to brighten a spring afternoon, these adorable cups deliver smiles with every spoonful. The combination of creamy pudding, crunchy cookies, and sweet decorations creates a textural experience that delights both kids and adults alike, making them a recipe you'll return to year after year.
Recipe FAQ
- → Can I use homemade whipped cream instead of store-bought topping?
Yes, homemade whipped cream works beautifully and adds a fresh, creamy texture to the layers.
- → What type of cookies work best for the crumble layer?
Chocolate sandwich cookies like Oreos are ideal for their rich flavor and easy crumble texture.
- → How can I make these cups nut-free?
Ensure all cookies and candies are processed in nut-free facilities and check ingredient labels carefully.
- → Is it possible to prepare these in advance?
Yes, you can assemble them ahead and keep refrigerated until ready to serve to maintain freshness.
- → Can I substitute the marshmallow bunnies with other decorations?
Absolutely, chocolate bunnies or other Easter-themed candies can be used to personalize the presentation.