 Save
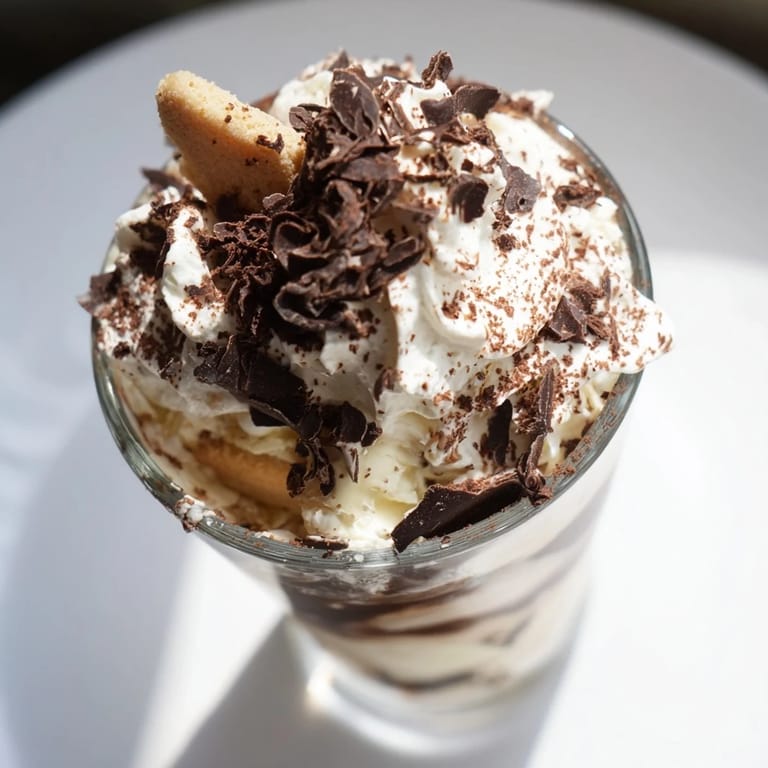
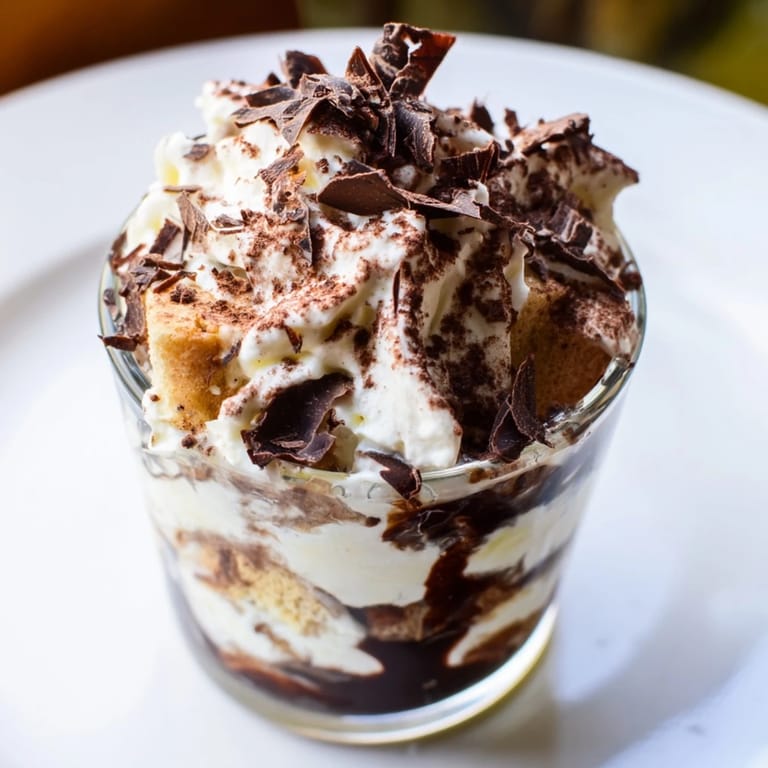
Save The first time I served tiramisu in shot glasses, it was a last-minute idea born from panic. I'd committed to bringing dessert to a dinner party but realized halfway through the day that a full cake seemed too formal for the casual vibe. Standing in my kitchen with mascarpone, espresso, and ladyfingers scattered across the counter, I thought: why not make it fun? The guests' faces when tiny glasses of creamy, coffee-soaked elegance appeared instead of plates told me I'd stumbled onto something special.
I remember my friend Marco leaning against my kitchen island, watching me layer the shots with a skeptical expression. He's a traditionalist—his nonna makes tiramisu the proper way in a deep dish, the way it's supposed to be. But when he tasted one, something shifted in his face. He didn't say much, just nodded slowly and reached for another. That's when I knew this playful twist had earned its place at the table.
Ingredients
- Ladyfinger biscuits (savoiardi), 8 broken into bite-sized pieces: These delicate, oblong cookies are the backbone of tiramisu—they have just enough structure to absorb the espresso without dissolving into mush, and their subtle sweetness balances the strong coffee perfectly.
- Freshly brewed espresso, 1/2 cup cooled: Use real espresso if you can; instant coffee in water just doesn't have the same depth and richness that makes these shots sing.
- Coffee liqueur (Kahlúa or Tia Maria), 2 tbsp: This adds a subtle sweetness and complexity that you'd miss without it—but if you're serving to non-drinkers, skip it and use more espresso instead.
- Mascarpone cheese, 1 cup at room temperature: Cold mascarpone is stiff and lumpy; leaving it out for 15 minutes makes all the difference in creating that silky texture.
- Heavy cream, 1/2 cup cold: This is what transforms mascarpone from dense to dreamy; whipping it to soft peaks and folding it in creates the cloud-like filling.
- Powdered sugar, 1/4 cup: Regular sugar won't dissolve smoothly into the cream, so don't skip the powdered version.
- Pure vanilla extract, 1 tsp: One teaspoon is enough to round out the flavors without overpowering the coffee.
- Unsweetened cocoa powder for dusting, 2 tbsp: The bitter cocoa against the sweet cream and strong coffee creates the perfect balance—this isn't optional.
- Dark chocolate shavings for garnish, optional: A vegetable peeler dragged across a chocolate bar creates shavings that look restaurant-quality and add a touch of elegance.
Tired of Takeout? 🥡
Get 10 meals you can make faster than delivery arrives. Seriously.
One email. No spam. Unsubscribe anytime.
Instructions
- Prepare the Coffee Mixture:
- Pour your cooled espresso into a shallow bowl and stir in the coffee liqueur. This isn't the time to rush—let it cool completely so it doesn't melt your cream later.
- Dip the Ladyfingers:
- Hold each ladyfinger piece over the bowl and dip it in for just a second or two—you want them kissed with coffee flavor, not falling apart. Set them on a plate as you go; they'll continue absorbing moisture even after they're out of the liquid.
- Make the Mascarpone Base:
- In a bowl, whisk together the room-temperature mascarpone, powdered sugar, and vanilla extract until it's completely smooth with no lumps. This takes about a minute of gentle whisking—don't overwork it or you'll end up with a grainy texture.
- Whip and Fold the Cream:
- In another bowl, whip the cold heavy cream until soft peaks form—you want it to hold a shape but still look billowy and light. Then gently fold this whipped cream into your mascarpone mixture with a spatula, using slow, careful strokes until there are no white streaks left.
- Layer the First Round:
- Place a few pieces of the espresso-soaked ladyfingers in the bottom of each shot glass, letting them settle to create a flat base. This is where you set the foundation for everything else.
- Add the Cream Layer:
- Spoon or pipe a generous layer of the mascarpone cream over the biscuits, filling about halfway up the glass. If you're using a piping bag, this is where your shots start looking like actual restaurant-quality desserts.
- Repeat and Top:
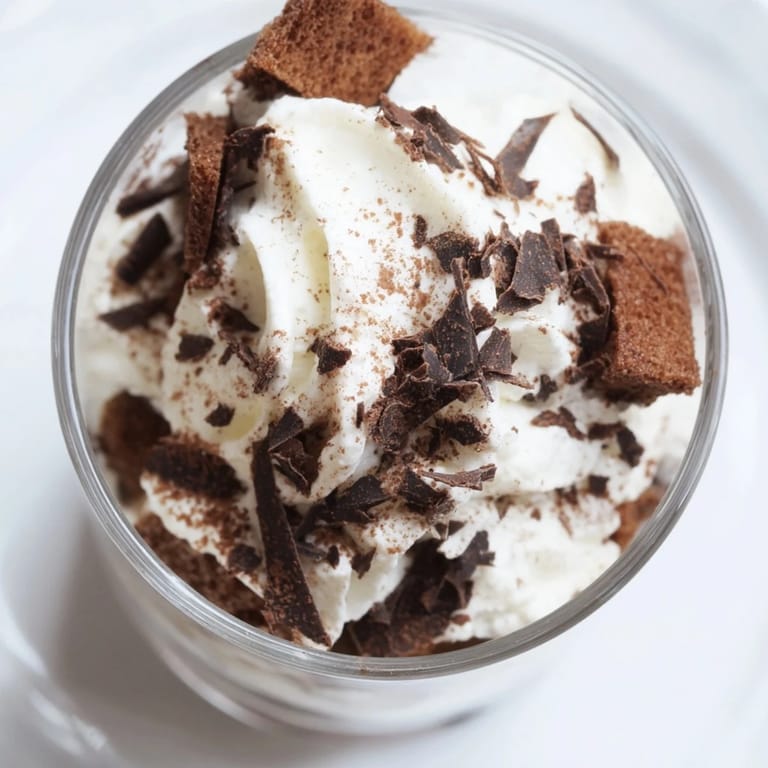
- Add a second layer of espresso-soaked biscuits, then finish with another layer of mascarpone cream right to the rim. The cream should be smooth and level on top, ready for its cocoa powder crown.
- Dust and Garnish:
- Using a fine sieve or sifter, dust each shot with unsweetened cocoa powder—use a light hand so you don't overdose on bitterness. Add chocolate shavings now if you're using them, letting them stick to the cocoa powder.
- Chill and Serve:
- Refrigerate for at least an hour before serving so the flavors meld and the cream sets just slightly. This also gives the ladyfingers time to fully soften and marry with the cream, creating that signature tiramisu texture.
 Save
Save There was a moment during that dinner party when everyone went quiet except for the soft clink of spoons in glasses. Someone looked up and said this tasted like elegance but felt like a friend made it—and I realized that's exactly what I was going for. These little shots had become more than just tiramisu; they were a conversation starter, a mood setter, proof that sometimes the best ideas come from standing in your kitchen in a slight panic.
The Magic of Making Tiramisu Small
There's something about serving dessert in shot glasses that changes the entire experience. Maybe it's because you can finish it in a few bites without commitment, or maybe it's because everyone at a party can grab one and keep mingling. What I've learned is that tiramisu—that heavy, rich, you-need-to-sit-down-to-eat-this dessert—somehow becomes lighter and more approachable when it's tiny. The proportions suddenly feel elegant instead of indulgent, and people eat two without guilt because they tell themselves it's just a little bite.
Playing with Flavors and Substitutions
Once you master the basic formula, this recipe becomes your playground. I've experimented with swapping the coffee liqueur for Amaretto (which creates this almond-meets-cocoa moment that's completely different), using strong cold brew instead of espresso for a more subtle coffee note, and even replacing some of the mascarpone with a tiny bit of ricotta for a lighter texture. The framework stays the same—soaked biscuits, creamy filling, cocoa dust—but the variations are endless. My favorite accidental discovery was when I added a pinch of cinnamon to the mascarpone mixture on a whim, and suddenly it tasted like someone's grandmother had whispered her secrets into the bowl.
Timing and Make-Ahead Strategy
The beauty of these shots is that they genuinely improve with time—assemble them up to two days ahead and store them in the fridge, covered loosely with plastic wrap so they don't pick up other flavors. The cream firms up slightly, the biscuits soften into the filling, and the whole thing becomes more integrated and delicious. I usually make them the morning of the party, which gives them about four to six hours to develop, and that's honestly the sweet spot. If you're really organized, you can even dip the biscuits and whip the cream earlier in the day, then assemble everything an hour before guests arrive.
- Assemble these up to two days ahead and they only get better, not worse.
- Dusting with cocoa happens right before serving so it doesn't absorb moisture and turn muddy-looking.
- Keep them in the coldest part of your fridge, away from anything pungent, so they taste purely of coffee and cream.
 Save
Save These shots have become my go-to when I want to feel like I've spent hours in the kitchen but actually haven't. They're proof that sometimes the smallest presentations create the biggest impressions.
Recipe FAQ
- → What makes these tiramisu shots unique?
They feature separate layers of espresso-soaked biscuits and whipped mascarpone cream served in shot glasses, creating a playful presentation.
- → Can I omit the coffee liqueur?
Yes, replacing the liqueur with extra espresso keeps the coffee flavor while making it non-alcoholic.
- → Which biscuits work best for layering?
Ladyfinger biscuits (savoiardi) are ideal due to their light texture and ability to absorb espresso without becoming soggy.
- → How should I serve these tiramisu shots?
Chill them for at least an hour before serving to allow flavors to meld and maintain their layered form.
- → Are there suitable substitutions for ladyfingers?
Sponge cake or gluten-free biscuits can be used if dietary needs or preferences require it.