 Save
Save The sharp snap of candy melts coating the kitchen counters signaled the official start of graduation season for us one year. While prepping these cake pops, the scent of baked vanilla cake drifted through the house, blending with laughter over picking which school colors would look best. I remember the hum of the microwave and the playful debates about whether sprinkles or glitter really said "class of" best. Cake pops have a knack for turning ordinary afternoons into miniature celebrations. It felt almost ceremonial watching each treat come together, ready to mark a milestone.
One spring day, I made a batch for my cousin's graduation, and quickly learned that assembling cake pops gets everyone involved (and a little bit messy). We competed to see who could roll the most perfect spheres, and someone always snuck extra decorations on their pop. When the finished tray emerged, we cheered—each pop sporting different glitter and year numbers, proof of a group effort that doubled as dessert and centerpiece.
Ingredients
- Vanilla or chocolate cake mix: Any classic mix sets a solid base, but make sure to let the cake cool fully or you'll end up with sticky crumbs.
- Cream cheese or buttercream frosting: The secret to binding the crumbs; start slow so you don't over-saturate and lose the pop shape.
- Candy melts in school colors: These bring the "wow" factor and are easier to work with than regular chocolate—give the melts a gentle stir after each round in the microwave.
- Vegetable shortening: If the melted coating feels thick, a spoonful smooths things out for dipping.
- Sprinkles, colored sugar, edible glitter: Use any or all—just be ready to decorate quickly before the shell sets.
- Lollipop sticks: The backbone of every pop; a quick tip is to dip the stick tip in coating before inserting, so the ball stays secure.
- Mini chocolate chips: Perfect for tiny tassels or outlining the graduation cap—press gently, or the coating might crack.
- Fondant in school colors (optional): For graduation caps, cut squares with a small knife; don't worry about perfection, the fun is in the details.
Tired of Takeout? 🥡
Get 10 meals you can make faster than delivery arrives. Seriously.
One email. No spam. Unsubscribe anytime.
Instructions
- Bake and Cool the Cake:
- Whip up your cake following the box or recipe instructions, then let it cool completely before the next step—patience pays off in texture and shape.
- Crumble and Mix:
- Break the cake into fine crumbs in a big bowl, then blend in frosting with clean hands or a spatula until it sticks together but isn't too wet.
- Shape Cake Pops:
- Scoop out tablespoon-sized portions and roll them into 24 even balls—aim for consistency, but don't stress if some are unique.
- Chill the Pops:
- Place the shaped balls on a lined tray and pop them in the fridge for at least an hour or into the freezer for a quick 20-minute set.
- Prepare the Coating:
- Melt your candy melts in a microwave-safe bowl, stirring every 30 seconds until smooth—add a bit of shortening if needed for a silky finish.
- Insert Sticks:
- Dip each lollipop stick tip in the melted coating, then gently push it halfway into the cake ball to anchor it.
- Dip and Decorate:
- Submerge each pop fully in melted coating, tap gently to let excess drip off, then decorate with sprinkles or glitter while the shell is still wet.
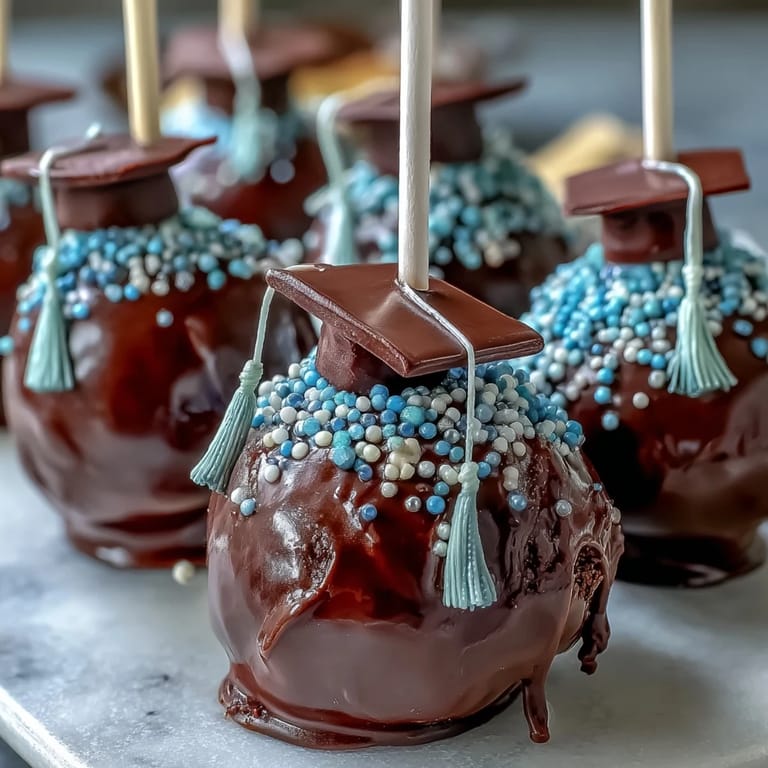
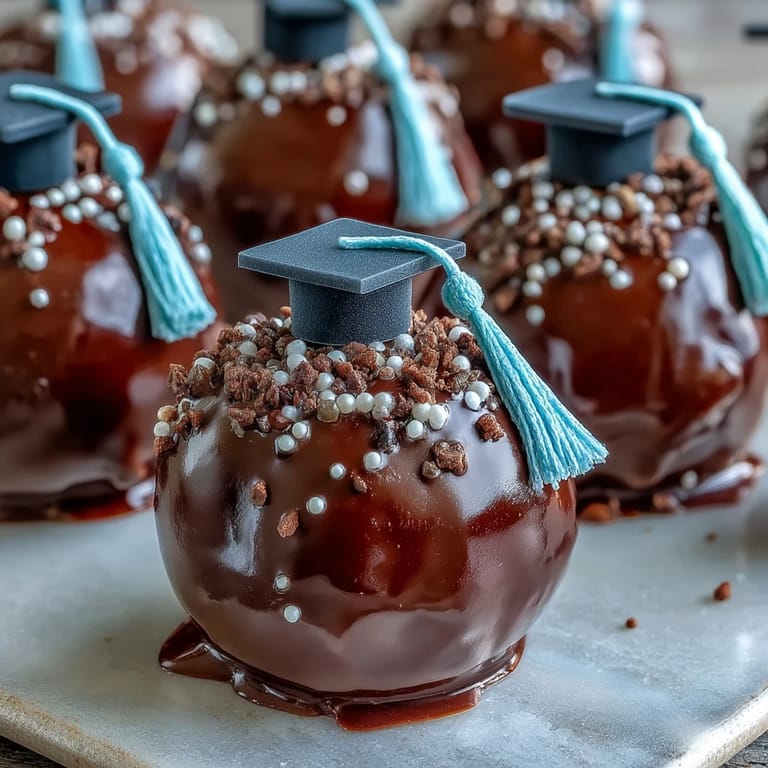
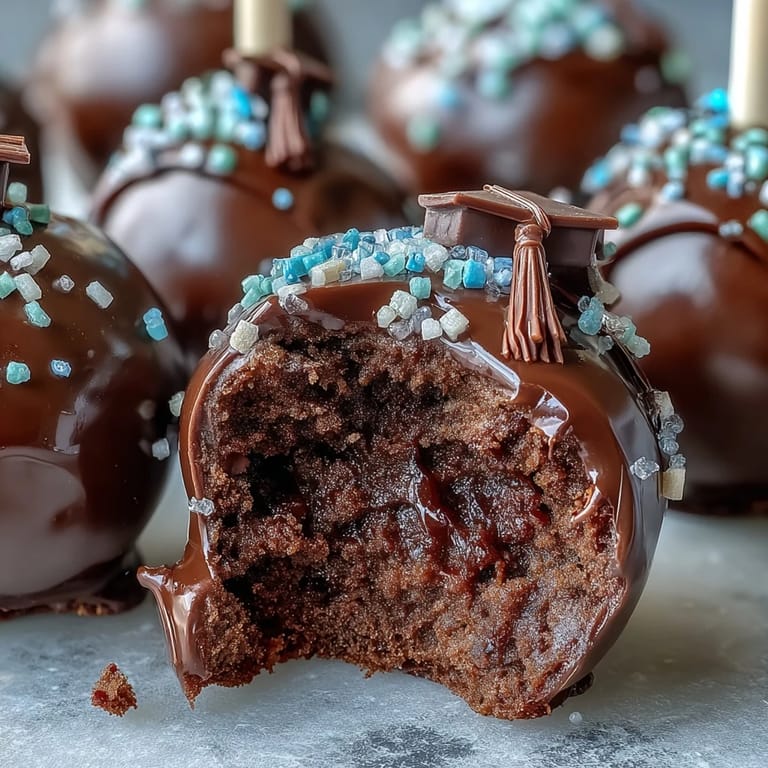
- Graduation Cap Touches:
- If you're capping them, press a fondant square on top, adding a mini chocolate chip tassel with a spot of melted coating—that little detail always earns smiles.
- Let Pops Set:
- Stand the decorated pops upright in a styrofoam block or stand; let the chocolate coating harden before serving or packing.
 Save
Save We shared these cake pops after the ceremony, and the chatter turned from speeches to which ones tasted best. That night, these treats became snapshots of celebration—tiny morsels packed with color, cheer, and everything graduation stands for.
Making Pops for a Crowd
Doubling the recipe does not mean double the stress; prepping ahead and storing chilled balls makes assembling with friends a breeze. Teamwork transforms decorating into a lively station where mistakes are just part of the fun.
Getting the Perfect Coating
Keeping the melted candy at just the right consistency is key. Thicker melts can drag on cake pops, so a bit of shortening gives you that velvety dip for a professional finish.
Decorating Like a Pro
Have all your decorations ready before dipping begins, because the coating sets fast. Working in small batches lets you focus on details without rushing.
- Lay out sprinkles and fondant to streamline decorating.
- Clean up spilled glitter right away—it gets everywhere.
- Let pops cool completely before packing, or condensation will dull the colors.
 Save
Save Whether you're celebrating at home or bringing these to a ceremony, these cake pops add cheer to any milestone. It's a treat you'll find yourself making whenever there's something big worth celebrating.
Recipe FAQ
- → How do I match cake pops to my school colors?
Select candy melts or colored chocolate that coordinate with your school colors. Use sprinkles and fondant in matching shades for accents.
- → Can I use homemade cake instead of cake mix?
Absolutely! A fully cooled homemade cake can be crumbled and mixed with frosting to form cake pops, offering extra flavor and control.
- → How long do cake pops stay fresh?
Store them in an airtight container at room temperature for 3 days, or refrigerate up to a week to maintain freshness and texture.
- → What is the best way to prevent cake pops from falling off the sticks?
Dip the tip of each stick in melted chocolate before inserting it into the cake ball, then let pops chill so the chocolate sets firmly.
- → How can I make these gluten-free?
Use gluten-free cake mix and double-check all decorations and coatings for gluten content, as ingredient sources may vary.
- → Can I prepare cake pops ahead of time?
Yes! Cake pops can be made in advance and held in the refrigerator or freezer. Decorate after dipping and chill until serving.