 Save
Save I made this board on a whim last December, hunting for something that would make guests actually stop and stare before diving in. Standing in my kitchen with a star-shaped cookie cutter in hand, I realized I was building something more than an appetizer—it was edible theater. The moment those cheese points caught the light, I knew I'd stumbled onto something special.
My sister watched me assemble this for her engagement party and kept texting the photo to people before guests even arrived. What struck me wasn't the compliments—it was how people naturally gathered around it, plucking nuts and berries, having actual conversations instead of just circling appetizers. That's when I realized the real magic: a beautiful board becomes a permission slip for people to linger and connect.
Ingredients
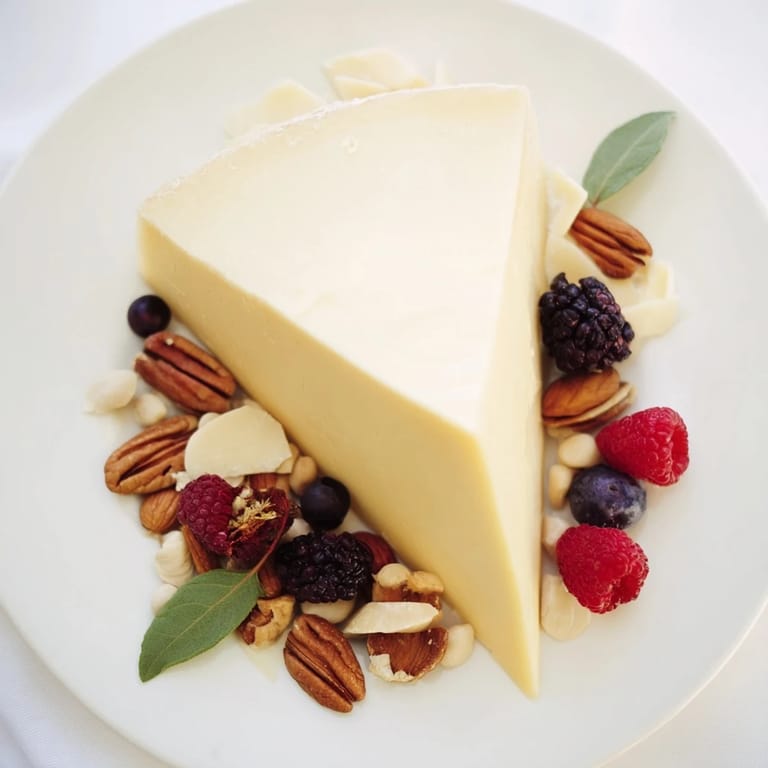
- Firm cheese (200g): Cheddar, gouda, or manchego work beautifully because they hold clean lines when you cut them and taste rich enough to anchor the whole board without overwhelming the delicate berries.
- Almonds (50g): Their mild, slightly sweet flavor acts as a neutral bridge between the creamy cheese and tart berries.
- Pecan halves (50g): These add richness and a buttery warmth that mellows everything around them.
- Walnuts (50g): Their earthiness keeps the board from feeling too precious or one-note.
- Fresh blueberries (100g): The firmer texture holds up during serving, and their subtle tartness cuts through the richness beautifully.
- Raspberries (100g): These are delicate little flavor bombs—place them gently so they don't crush before guests reach them.
- Blackberries (100g): Their deep color grounds the palette and their jammy sweetness surprises people.
- Dried cranberries (50g): These jewel-toned pieces fill gaps and add a tart pop that keeps your palate engaged.
- Gluten-free crackers or baguette slices: Choose whatever makes you happiest—I prefer a crusty baguette, but any accompaniment is truly optional.
- Fresh mint leaves: A whisper of green that makes the whole thing feel intentional and garden-fresh.
Tired of Takeout? 🥡
Get 10 meals you can make faster than delivery arrives. Seriously.
One email. No spam. Unsubscribe anytime.
Instructions
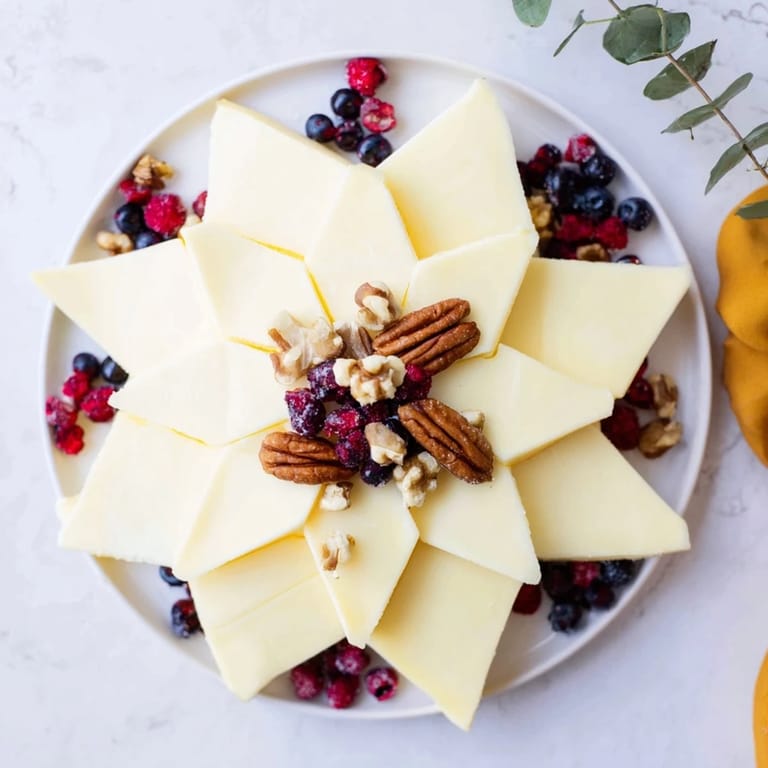
- Cut your star:
- Press your cookie cutter firmly into the cheese block, or use a sharp knife to score and carefully carve the outline. The knife method gives you more control and that satisfying moment when the final point emerges cleanly.
- Position the centerpiece:
- Place your cheese star slightly off-center toward the top of your board—this leaves plenty of room for the tail to flow naturally without feeling cramped.
- Create the tail:
- Arrange mixed nuts in a diagonal line flowing away from the star's bottom point, angling slightly toward one corner. Stagger them so there's breathing room between each piece, rather than clustering them together.
- Build layers with berries:
- Scatter fresh and dried berries throughout the nut tail, tucking them between nuts to catch light and create visual interest. The color variation is half the magic here.
- Fill thoughtfully:
- Look for any gaps that feel empty, and tuck in extra nuts or berries to create an abundant, generous feel. Step back and squint at it—you want it to feel full but not overcrowded.
- Add crackers if using:
- Position them casually to the side rather than scattered throughout, so they don't compete with the star design.
- Finish with mint:
- Tuck fresh mint leaves around the edges and across the board, particularly where they'll catch attention and add that final garden-fresh flourish.
 Save
Save My favorite moment came when someone's grandchild pointed at the board and called it a 'magic cheese star,' and suddenly the whole table got quiet for just a second, looking at it differently. That's when I understood that food arranged with intention creates a small feeling of wonder, which honestly costs nothing but transforms everything.
Why This Board Works for Almost Every Occasion
The beauty of this design is its flexibility—it reads as celebratory without requiring a special reason. I've made it for casual dinner parties, holiday gatherings, baby showers, and even a friends-night-in situation where we just wanted something beautiful to gather around. The ingredients are accessible year-round, and you can theme it by swapping nuts or fruit based on the season or guests' preferences.
Cheese Selection Secrets
The type of cheese you choose sets the whole tone. I learned this after trying a soft brie star that got mushy and sad—you need something with backbone. Medium to firm cheeses hold their shape and have enough flavor to stand up to the bright berries without needing heat or cooking to develop taste. The color of your cheese matters too; a pale manchego looks stunning against dark berries, while a golden cheddar creates warm, autumn vibes.
Timing and Temperature Tricks
Cheese tastes better when it's not ice cold—if you've refrigerated it, pull your board out about fifteen minutes before serving so the cheese softens just enough to be actually enjoyable. Cold cheese tastes less flavorful, and the whole point is letting these quality ingredients shine. I also discovered that keeping the board in a cool spot (not the fridge, just cool air) prevents the berries from weeping juice into the cheese while still keeping nuts crisp and cheese manageable.
- Room temperature cheese is more flavorful than straight-from-the-fridge, so plan accordingly.
- Assemble everything at the last possible moment so berries stay fresh and nuts don't soften.
- If you're making this hours ahead, keep the cheese separate and arrange just before guests arrive.
 Save
Save There's something quietly powerful about putting care into how food looks before it's eaten. This board has taught me that presentation isn't pretentious—it's an act of generosity that says, 'I wanted this moment to feel special for you.'
Recipe FAQ
- → How do I create the star shape from the cheese?
Use a star-shaped cookie cutter or a sharp knife to carefully cut the cheese block into a star shape for a dramatic centerpiece.
- → Can I substitute the nuts and berries?
Yes, feel free to swap in your favorite nuts or dried fruits to personalize the board's texture and flavor.
- → What type of cheese works best?
Firm cheeses like cheddar, gouda, or manchego are ideal for cutting into shapes and holding their form on the board.
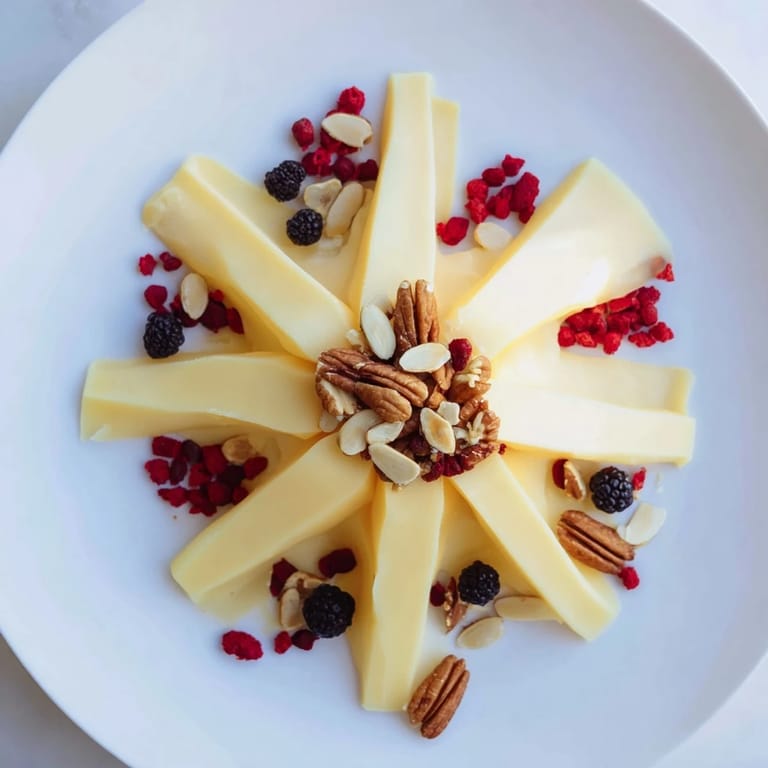
- → How should I arrange the nuts and berries?
Arrange mixed nuts in a diagonal line extending from the cheese star, then intermingle fresh and dried berries for a colorful, cascading effect.
- → What sides complement this cheese board?
Gluten-free crackers or baguette slices work well, along with fresh mint leaves to add a touch of greenery and freshness.
- → Is this board suitable for gluten-free diets?
Yes, using gluten-free crackers or bread ensures the board remains gluten-free, suitable for those with sensitivities.