 Save
Save There's something magical about turning simple chocolate bars into edible trees. My nephew watched me stack those first Kinder bars with such focus, his eyes tracking every drizzle of chocolate like I was performing actual kitchen wizardry. What started as "let's make something festive" became the most anticipated dessert at our Christmas table, and now I can't imagine December without them.
I'll never forget when my partner's mother asked for the recipe after one bite, then admitted she made three batches before New Year's because everyone kept asking her to bring them to parties. That's when I realized these little trees had somehow become her signature dessert, and she'd only learned about them from me that one afternoon.
Ingredients
- 24 mini Kinder chocolate bars: The foundation of your trees—if you can't find Kinder bars, use any chocolate bars roughly the same size, though the oval shape of Kinders really does create that perfect tree silhouette.
- 150 g dark or milk chocolate, chopped: The glue holding your creation together; dark chocolate creates drama, milk chocolate feels cozier.
- 1 tsp coconut oil: This tiny addition makes the chocolate flow like silk when you drizzle it, preventing that stiff consistency that cracks.
- 3 tbsp festive sprinkles or edible glitter: The moment these hit warm chocolate is pure joy—they stick instantly and add that sparkle that makes these feel special.
- 8 mini chocolate or candy stars: Your tree toppers, placed while the chocolate is still tacky so they settle in perfectly.
Tired of Takeout? 🥡
Get 10 meals you can make faster than delivery arrives. Seriously.
One email. No spam. Unsubscribe anytime.
Instructions
- Line your stage:
- Spread parchment paper across a tray or baking sheet, giving yourself room to work without trees crowding each other.
- Unwrap and arrange:
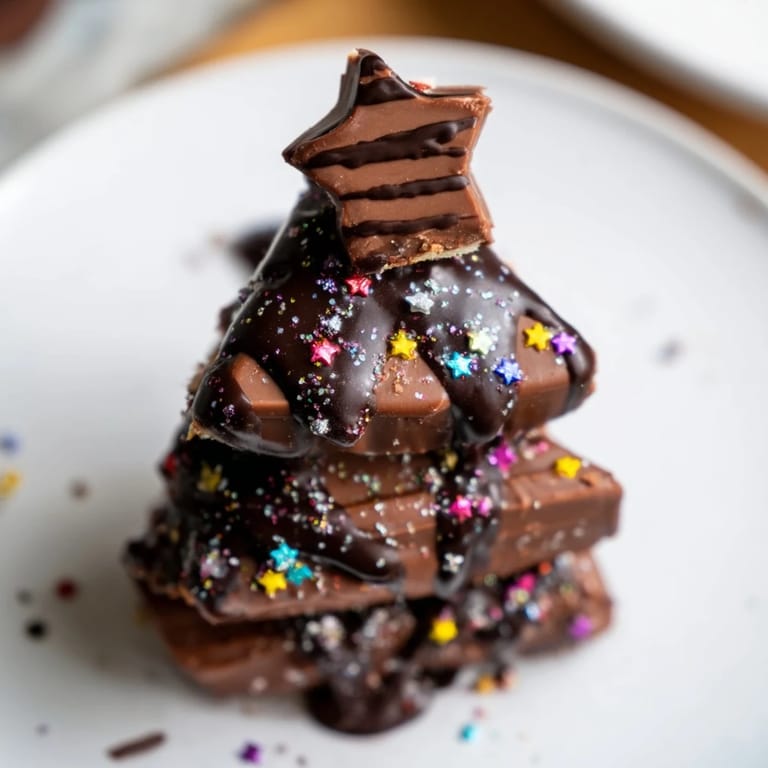
- Free all your Kinder bars from their foil. For each tree, start with one whole bar as your base, break another in half and overlap those pieces to create triangular height, then add another bar on top for dimension—it doesn't need to be architectural perfection, just tree-shaped.
- Space and steady:
- Place your stacked arrangements across the tray with enough space between them so the chocolate drizzle won't connect into one messy puddle.
- Melt with intention:
- In a heatproof bowl over simmering water (or microwave in twenty-second bursts), let the chopped chocolate and coconut oil become one smooth, pourable stream. Stir constantly and stop the moment it's glossy.
- Drizzle like you mean it:
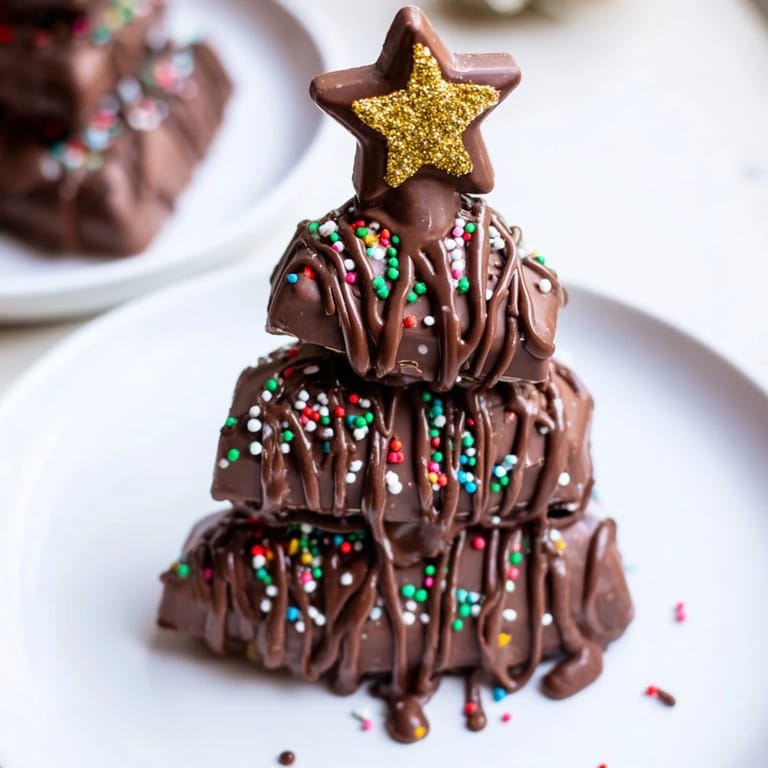
- Using a spoon or piping bag, let chocolate cascade over and between your stacked bars in generous ribbons, covering gaps and creating that branch-like effect that makes them look deliberately festive.
- Decorate while warm:
- Scatter sprinkles immediately—they'll cling to warm chocolate—and crown each tree with a star while the chocolate still grips it.
- Chill and set:
- Slide into the refrigerator for ten to fifteen minutes until the chocolate firms up completely.
- Serve and savor:
- Bring them out chilled or let them sit at room temperature—either way, they're meant to be eaten with your hands.
 Save
Save Watching my godson carefully place a star atop his wobbly chocolate tree, then seeing his face when he realized it actually stayed put, made me understand why these aren't just desserts. They're small moments of pride and creativity wrapped in chocolate.
Choosing Your Chocolate
I've made these with white chocolate for an elegant snowy look, milk chocolate for crowd-pleasing sweetness, and dark chocolate for a more sophisticated vibe. The chocolate you choose as your drizzle becomes the visual and flavor statement, so pick what speaks to your celebration. Dark creates moody elegance, milk feels nostalgic and festive, and white gives you a blank canvas for colorful sprinkles to shine.
Swaps and Substitutions
Can't find Kinder bars or want to use what's in your pantry? Any fun-sized chocolate bar works—Cadbury, Lindt, even homemade chocolate chunks stacked and bound together. The beauty of this recipe is its flexibility. I've used hazelnut chocolate bars when that's what was available, and the result was equally delicious, just a different flavor story than the original.
Storage and Make-Ahead Magic
These trees live happily in an airtight container for up to a week in a cool spot, making them perfect for getting ahead during the holiday rush. I've stacked them the day before and refrigerated them overnight without any collapse or chocolate blooming, which means you can build an army of trees before guests arrive. Keep them away from radiators and direct sunlight, or they'll start to soften and lean.
- Make them two or three days ahead and let your fridge do the work.
- Transport them in their container, not on a fancy serving plate, to protect the drizzle.
- If they soften at room temperature, a quick chill revives them to perfect texture.
 Save
Save These chocolate trees prove that the best holiday treats aren't complicated—they're just chocolate, creativity, and the joy of making something beautiful with your own hands. That's worth celebrating.
Recipe FAQ
- → What type of chocolate can I use for the drizzle?
Use dark, milk, or white chocolate depending on your flavor preference. Coconut oil can be added for smoother melting.
- → Can I substitute the mini Kinder bars?
Yes, any small chocolate bars with a similar shape can be used to create the tree stacks.
- → How long should the chocolate stacks chill?
Chill in the refrigerator for 10–15 minutes until the drizzle sets firmly.
- → Are these treats suitable for children to make?
Absolutely, stacking bars and adding decorations are fun and easy tasks for kids under supervision.
- → How should I store the chocolate trees?
Store in an airtight container in a cool place for up to one week to maintain freshness.
- → Do these treats contain common allergens?
They contain milk and soy, and depending on the chocolate used, may have traces of nuts and gluten. Always check packaging.