 Save
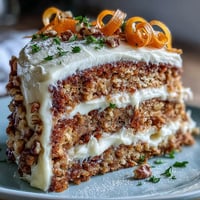
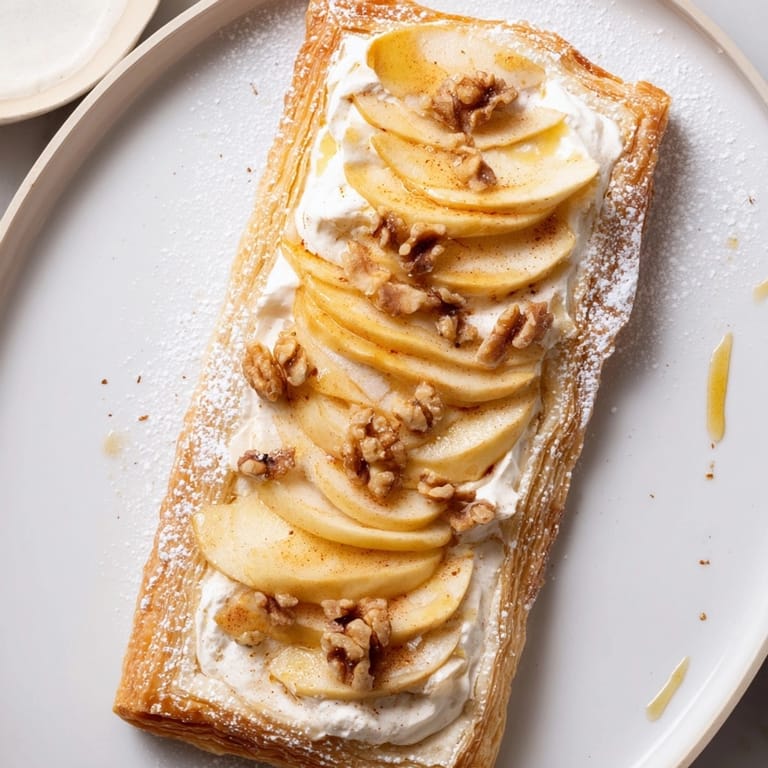
Save Ricotta Apple Breakfast Tarts are my favorite answer to chilly mornings and lazy brunches when we crave something cozy yet low effort. Imagine buttery pastry that's crisp and golden, layered with creamy ricotta, warm apples, and a touch of cinnamon. It is a recipe I often turn to when I want to impress guests or simply treat myself to a bakery-style breakfast without any fuss.
I whipped these tarts up last fall when friends dropped by unannounced. Everyone thought I spent hours on them but the secret is it is almost no work at all. Now this is my go-to when apples are in season or I want an easy weekend treat.
Ingredients
- Puff pastry sheet: This is your shortcut to a flaky buttery crust. Buy an all-butter version for best flavor and always thaw according to package instructions.
- Apple: You want a firm sweet-tart variety like Honeycrisp or Granny Smith so the slices hold up and do not turn mushy.
- Ricotta cheese: Delivers a creamy base that pairs perfectly with apples. Use whole milk ricotta for richness and check for a smooth texture with no lumps.
- Honey: Brings natural sweetness and a little floral note. Local raw honey adds even more flavor depth.
- Vanilla extract: Enhances the creamy and apple flavors. Go for pure extract if you can.
- Granulated sugar: Balances the tartness of apples and helps them caramelize in the oven.
- Ground cinnamon: Adds warmth and coziness. Look for true cinnamon for best aroma.
- Egg with a splash of milk: For an egg wash that gives the pastry a shiny golden finish.
- Optional garnishes: Toasted walnuts or pecans for crunch and a nutty hit or a dusting of powdered sugar for extra charm.
Tired of Takeout? 🥡
Get 10 meals you can make faster than delivery arrives. Seriously.
One email. No spam. Unsubscribe anytime.
Instructions
- Prepare the Baking Sheet:
- Line your baking sheet with parchment paper so the tarts lift off easily after baking and there is no risk of sticking.
- Roll and Cut the Pastry:
- Roll out the puff pastry gently on a lightly floured surface to smooth any creases. Use a sharp knife to cut it into four even rectangles.
- Score the Edges:
- Create a border by scoring a line about one centimeter inside each edge. Do not cut through. This step is what makes the edges puff dramatically around the filling like bakery tarts.
- Make the Ricotta Filling:
- In a small bowl combine the ricotta honey and vanilla. Stir until silky smooth. Taste and adjust the sweetness if needed.
- Add the Filling:
- Spoon the ricotta mixture inside the scored borders of each pastry. Spread carefully so you leave the edges clean for puffing.
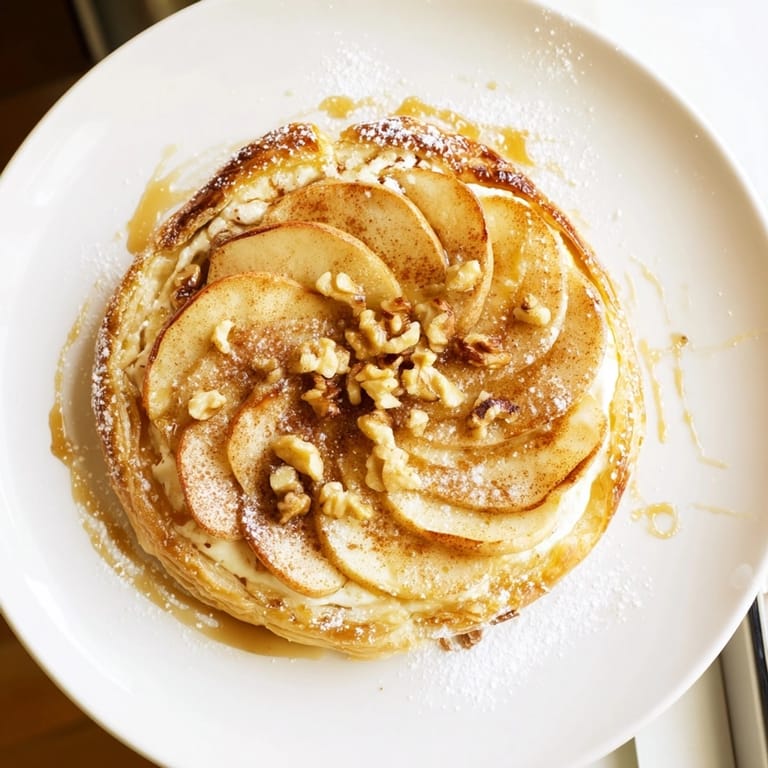
- Layer the Apples:
- Arrange a tight row of apple slices on top of the ricotta. Slightly overlap them to create a pretty shingle effect so every bite gets fruit.
- Sprinkle Cinnamon Sugar:
- Blend the sugar and cinnamon together and shower it over the apples evenly. This helps them caramelize and brings out their sweetness.
- Brush the Pastry Edges:
- Beat the egg with the milk until blended then use a pastry brush to paint the mixture on the pastry borders. This is your secret to a glossy bakery finish.
- Bake Until Golden:
- Slide the tray into your preheated oven. Bake for twenty two to twenty five minutes until the pastry is deep golden and apples are softened with a tiny bit of caramel color at the edges.
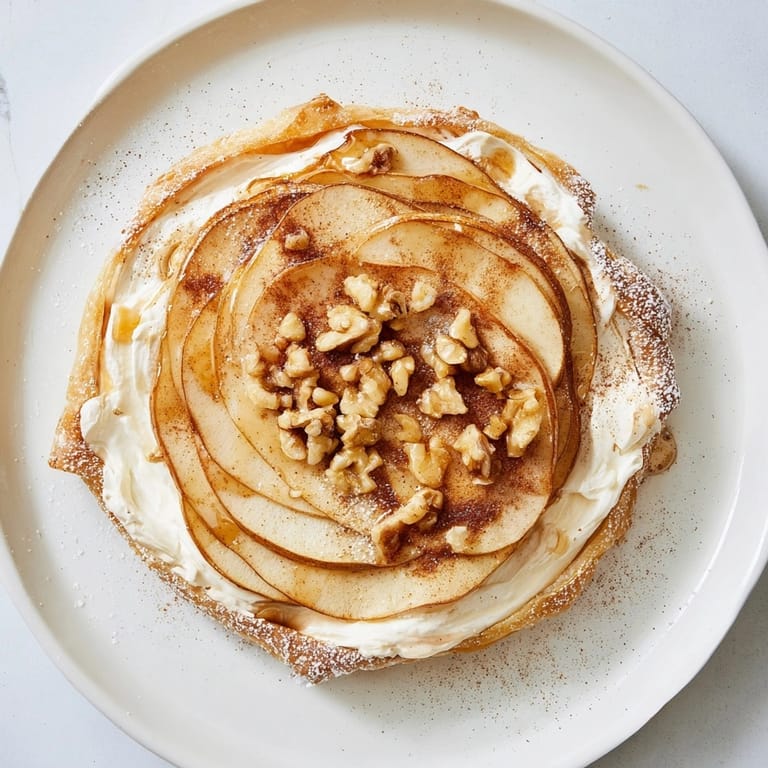
- Cool and Garnish:
- Let the tarts cool just a little so the ricotta firms up. Finish with extra honey, nuts, or a dusting of powdered sugar if you like more sweetness and crunch.
- Serve:
- Enjoy while still slightly warm or let them come to room temperature. They are excellent with coffee or tea for the full bakery experience.
 Save
Save My favorite part is how the honey melts down onto the hot pastry. My daughter and I love drizzling a little extra right before serving and sharing these tarts on rainy school mornings. They always bring sweet memories of weekend baking together.
Storage Tips
Let leftover tarts cool completely then store in an airtight container in the fridge for up to two days. Reheat in a toaster oven just until crisp again and enjoy as a quick snack or breakfast. I find that freezing the unbaked tarts works best if you want to prep ahead. Assemble up to the egg wash, freeze on a tray, then bake directly from frozen with a few extra minutes in the oven.
Ingredient Substitutions
Swap out pears for apples if you want a gentle floral sweetness. For a dairy-free version use your favorite plant-based ricotta. If you love bold flavor, a sprinkle of cardamom or nutmeg can add a new dimension. Chopped almonds also work if you are out of walnuts or pecans.
Serving Suggestions
For brunch serve with fresh berries and a dollop of Greek yogurt on the side. At dessert add a scoop of vanilla ice cream or a swirl of whipped cream for an indulgent finish. These tarts also work beautifully cut into bite-sized squares as a festive party finger food.
Cultural and Seasonal Inspiration
Fruit tarts are traditional across so many European cultures as a celebration breakfast or holiday treat. In autumn use apples at their peak. In spring try fresh strawberries or rhubarb with lemon zest. For winter holidays use a blend of apples and pears with a hint of clove.
 Save
Save The perfect breakfast treat, these tarts come together quickly and deliver both warmth and elegance. Try them on a cozy morning and you'll find yourself making them again and again.
Recipe FAQ
- → Can I prepare the tarts ahead of time?
Yes, you can assemble the tarts and refrigerate before baking. Bake fresh for optimal flakiness, or reheat briefly before serving.
- → Which apples work best for these tarts?
Firm varieties like Honeycrisp or Granny Smith hold their shape and add pleasant tartness and sweetness.
- → Is it possible to make these tarts nut-free?
Absolutely. Simply skip optional nuts, and garnish with powdered sugar or enjoy as they are.
- → What other ingredients can I add for extra flavor?
Try a pinch of lemon zest in the ricotta mixture or a touch of cardamom with the cinnamon for fragrant variation.
- → Do I need to use store-bought puff pastry?
Store-bought is convenient, but homemade works wonderfully if you have time and enjoy making pastry from scratch.
- → How should the tarts be stored?
Store cooled tarts in an airtight container in the fridge for up to two days. Warm briefly before serving if desired.